Roofing Nails For First Layer

Is Roofing Felt Necessary On A Shed Roofing Felt Roofing Shed

How To Build Your Own Shed In 7 Steps Simple Shed Roofing Felt Slate Roof Cost
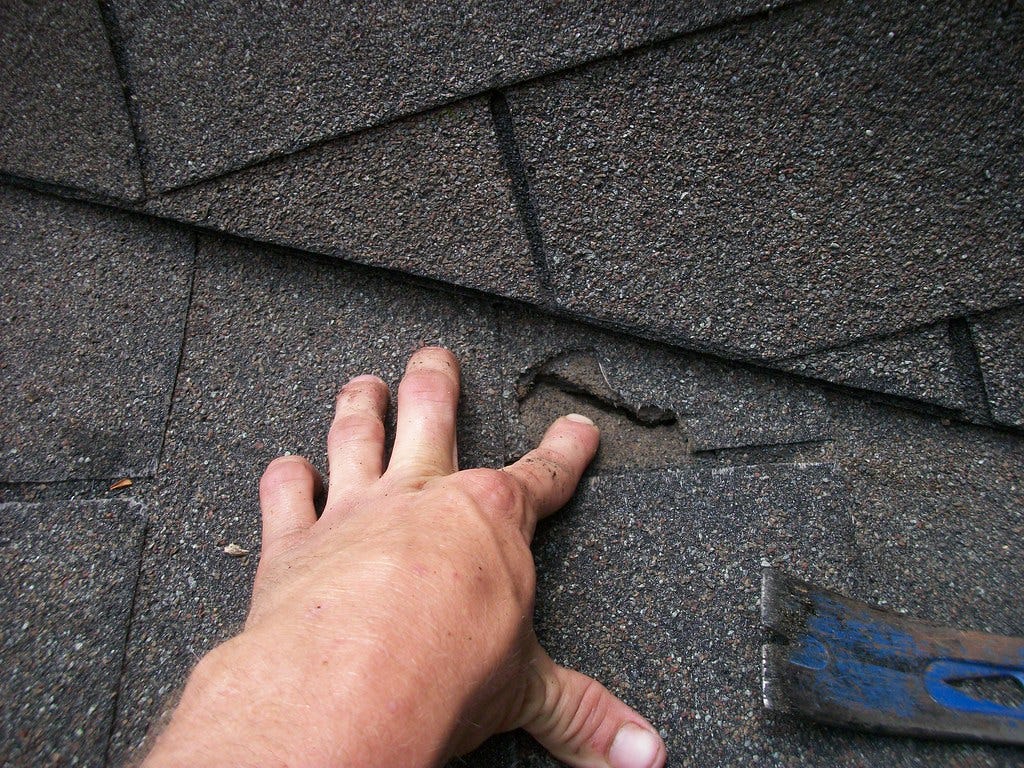
How Do You Cover Exposed Roofing Nails By Sellers Roofing Company New Brighton Medium
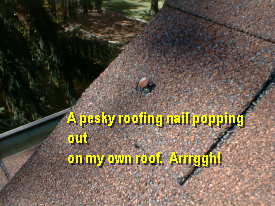
Roofing Nails That Pop Up

How To Tarp A Roof The Home Depot

Nail Art Roofing Nails On Embellished Wood Sukimoonpie Etsy Com Roofing Nails Crafts Diy Crafts

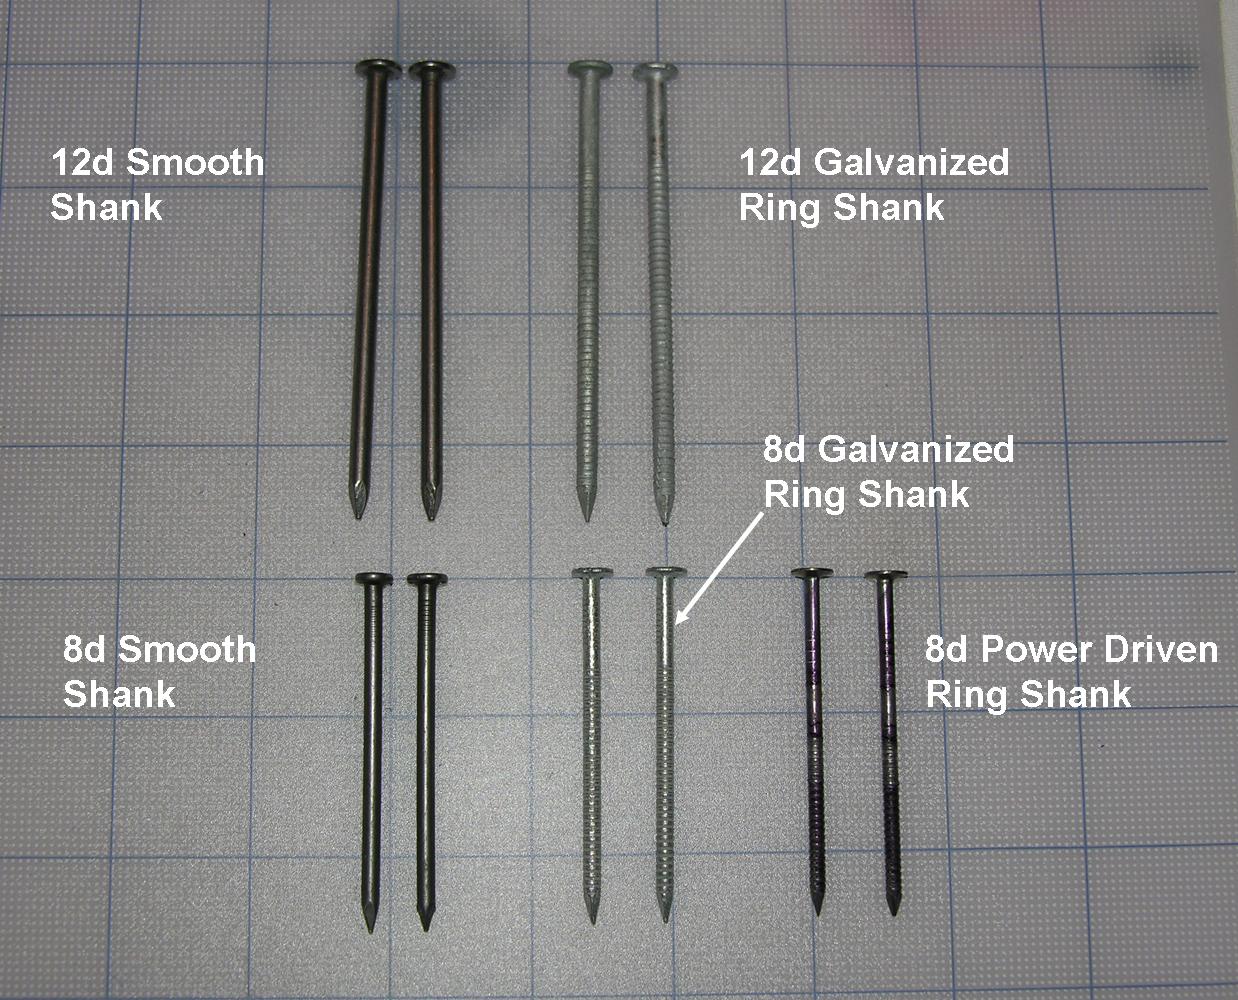
Select a length of roofing nails that penetrates completely through the new layer of shingles existing layer and the wood roof deck.
Roofing nails for first layer.

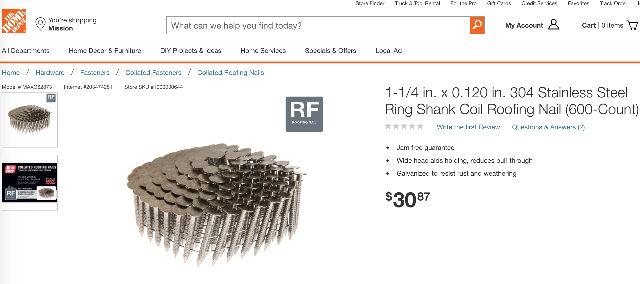
7 8 Smooth Galvanized Coil Roofing Nails 3 6m Jobpak Amazon Com

The Importance Of Choosing The Right Roofing Contractor With Images Roofing Nails Corrugated Metal Roof Roof Shingles
Hurricane Retrofit Guide What To Do When Re Roofing

Industrial Scientific Roofing Nails Galvanized Nails Insulation Board

Roofing Tips That Everyone Needs To Learn About In 2020 Roofing Roofing Specialists Roofing Companies

Diy Grillzebo With Gaf Roofing Shingles In 2020 Roof Shingles Installing Roof Shingles Roofing

You Can Stop Leaks Yourself No Experience Necessary We Show You How To Track Down And Do Roofing Leaking Roof Plumbing Vent Roof Repair

Grip Rite 112egrfg5 1 1 2 Inch Electro Galvanized Roofing Nail 5 Pounds Amazon Ca Tools Home Improvement

Important Knowledge On Properly Repairing Your Roof In 2020 Diy Roofing Roof Maintenance Roof

Simple And Ridiculous Tricks Can Change Your Life Roofing Design Traditional Roofing Design Solar Power Cedar Shingle Roof Installing Shingles Cedar Shingles
Asphalt Roofing Shingle Nail Types Asphalt Shingle Nail Staple Choices

Pretty Nail Design Ideas Purple Nails Pretty Nails

Roof Repair Basics How Your House Works In 2020 Home Repairs Home Repair Diy Roofing

Pin On Roofing

Roofingmaterials Roofing Materials Try Spraying Your Roof Down With Your Garden Hose In Order To Find The Leak Reme Roofing Materials Roofing Cool Roof

Embedded Image Permalink Roof Leak Repair Roof Repair Diy Leak Repair

Nail Salon 02360 Nail Delight Of Plymouth Ma Acrylic Nails Elegant Nails Carver Ma Elegant Nails Elegant Nails Elegant Nails Acrylic Nails Nail Salon

Pin By Sarah Pedroley On C S 10 Day Party Color Street Nails Color Street Nail Health
Https Encrypted Tbn0 Gstatic Com Images Q Tbn 3aand9gcq31fc7z8bxinrorfkguwmg Fmodzdyjuvk8uuyi39cc9tcnsy Usqp Cau

Roofing Guide While You Prepare To Acquire Your Homes Roof Replaced Do Not Forget That There Are Tons Of Nails Up There In 2020 Roofing Professional Roofing Roof

Gaf Timberline Natural Shadow Weathered Wood Algae Resistant Architectural Shingles 33 3 Sq Ft Per Bundle 21 Pieces 0601900 The Home Depot Roofing Asphalt Roof Shingles Architectural Shingles

Tar Paper In Floor Of Green House Well Help Capture Heat During The Day And Keep Plants Warm At Night Asphalt Roof Shingles Roof Patch Roof Shingles

Pin On Screening Materials At Thatchsupply Com

How To Install Stone Facing House Exterior Exterior Stone House Colors
Source : pinterest.com
